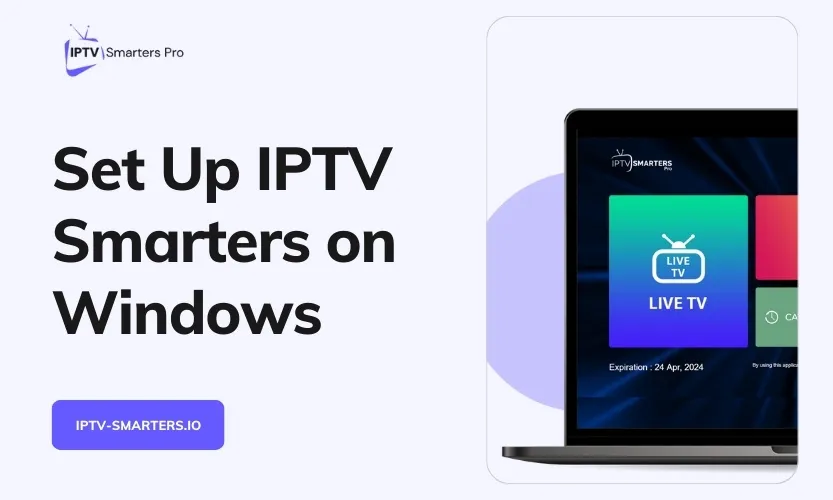
IPTV Smarters is a feature-packed IPTV player that offers a cable TV-like experience on your Windows 10/11 computer. It lets you stream live channels, video-on-demand content, and TV shows and movies from various Internet Protocol Television (IPTV) providers. With its ability to play virtually any video format, intuitive interface, and robust playback controls, IPTV Smarters has become the go-to IPTV player for many Windows users.
Key Benefits of IPTV Smarters
Before jumping into the installation steps, let’s look at some of the standout features and advantages of using IPTV Smarters on your Windows 10/11 PC:
- Supports a wide range of video formats including MPEG-TS, MP4, MOV, MKV, AVI, 3GP, FLV up to 4K at 60fps for an optimal streaming experience.
- Allows multi-screen streaming so you can share your IPTV subscription with up to 3 friends or family members simultaneously.
- Offers customizable parental controls to block inappropriate content and set child locks.
- Integrates with Electronic Program Guide (EPG) providing detailed information about upcoming programs, schedules, cast & crew, ratings, etc.
- Provides seamless VPN connectivity for secure streaming while protecting privacy.
- Runs smoothly even on low-end PCs with hardware-accelerated video rendering.
- Easy to set up with a user-friendly interface and provision for M3U playlist & Xtream codes log in.
System Requirements
Minimum Requirements
- Windows 10 version 1803 or higher OR Windows 11
- Intel Core i3 processor (6th gen+) / AMD Ryzen 3 or higher
- 4 GB RAM
- Intel HD Graphics 5000 or later / AMD Radeon R5 or better
- 10 GB free HDD space
- Internet connection with at least 10 Mbps speed
Recommended Specifications
- Windows 10 version 2004 OR Windows 11
- Intel Core i5 processor (8th gen+) / AMD Ryzen 5
- 8 GB RAM
- NVIDIA GeForce GTX 1060 or better
- 20 GB free SSD space
- Internet connection with at least 25 Mbps speed for 4K streaming
Installation Methods
You can install IPTV Smarters on your Windows 10/11 PC using one of these three methods:
- Microsoft Store (Easiest method)
- Official Website Download
- BlueStacks Android Emulator
Let’s explore each method in detail.
Method 1: Installing from Microsoft Store
The Microsoft Store offers the simplest and most secure way to install IPTV Smarters on your Windows PC.
Steps to Install IPTV Smarters from Microsoft Store:
- Click on the Start menu and open the Microsoft Store app (or search for “Microsoft Store” in the Windows search bar)
- In the Microsoft Store search bar, type “IPTV Smarters” and press Enter
- You’ll see multiple versions of the app. You can choose either:
- Smarters IPTV (Regular version)
- Smarters IPTV Pro (Pro version with additional features)
- Click on your preferred version
- Click the “Get” or “Install” button
- Wait for the download and installation to complete
- Once installed, click “Launch” to open the application
Advantages of Microsoft Store installation:
- Automatic updates
- Verified by Microsoft for security
- Easy installation process
- No additional software required
Method 2: Installing from the Official Website
You can download and install IPTV Smarters directly from the official website.
Steps to Install IPTV Smarters from Official Website:
- Open your web browser and navigate to the official IPTV Smarters website: iptvsmarters.com or iptvsmarterpro.app
- Navigate to the “Download” section
- Click on the “Windows” or “Download for Windows” button
- The installer file (typically named “IPTVSmartersPro-Setup-x.x.x.exe” where x.x.x is the version number) will start downloading
- Once downloaded, locate the installer file in your Downloads folder
- Right-click on the installer file and select “Run as administrator” (recommended)
- If a User Account Control prompt appears, click “Yes” to allow the installation
- Follow the on-screen instructions in the setup wizard:
- Accept the license agreement
- Choose the installation location (default is usually fine)
- Select additional tasks (create desktop shortcut, etc.)
- Click “Install” to begin the installation
- Wait for the installation to complete
- Click “Finish” to exit the setup wizard
- IPTV Smarters should now be installed on your computer
Note: Some antivirus software might flag the installer as suspicious. This is usually a false positive, but you can temporarily disable your antivirus during installation if needed.
Method 3: Installing via BlueStacks Android Emulator
If you prefer using the Android version of IPTV Smarters on your Windows PC, you can install it using the BlueStacks emulator.
Steps to Install IPTV Smarters using BlueStacks:
- Install BlueStacks:
- Visit the BlueStacks website: bluestacks.com
- Download the BlueStacks installer
- Run the installer and follow the on-screen instructions
- Complete the initial setup, including signing in with your Google account
- Install IPTV Smarters on BlueStacks:
- Launch BlueStacks from your desktop
- Open the Google Play Store app within BlueStacks
- In the search bar, type “IPTV Smarters Pro” and press Enter
- Select the IPTV Smarters Pro app from the search results
- Click “Install” and wait for the download and installation to complete
- Once installed, you can find and launch IPTV Smarters from the BlueStacks home screen or app drawer
Advantages of BlueStacks installation:
- Access to the Android version of the app
- Familiar mobile interface
- May have features not available in the Windows version
- Can use other Android apps alongside IPTV Smarters
Disadvantages:
- Requires more system resources
- May have slightly lower performance compared to native Windows app
- Additional setup steps required
Comparison of Installation Methods
| Method | Ease of Installation | Performance | Updates | Security |
|---|---|---|---|---|
| Microsoft Store | Very Easy | Excellent | Automatic | High |
| Official Website | Easy | Excellent | Manual | Medium-High |
| BlueStacks | Moderate | Good | Through Play Store | Medium |
Choose the method that best suits your preferences and requirements.
Troubleshooting Installation Issues
If you encounter issues during installation, try these solutions:
- Microsoft Store Installation Issues:
- Ensure your Windows is up to date
- Reset the Microsoft Store (Settings > Apps > Microsoft Store > Advanced options > Reset)
- Check your internet connection
- Official Website Installation Issues:
- Try running the installer as administrator
- Temporarily disable antivirus software
- Ensure you have sufficient disk space
- Download the installer again if it appears corrupted
- BlueStacks Installation Issues:
- Ensure your system meets BlueStacks requirements
- Update your graphics drivers
- Enable virtualization in BIOS/UEFI if available
- Try reinstalling BlueStacks
Setting Up IPTV Smarters
After successfully installing IPTV Smarters on your Windows 10/11 PC, the next step is to configure the application and add your IPTV provider details.
Adding an IPTV Provider
Before you can start streaming content, you need to add your IPTV provider details to the application. IPTV Smarters supports two main methods for adding providers:
Method 1: Using Xtream Codes API
This is the most common and recommended method for adding an IPTV provider:
- Launch IPTV Smarters on your Windows PC
- On the initial screen, click on the “Add User” button (usually located in the top-right corner)
- In the Add User pop-up window, select “Xtream Codes API”
- Enter the following details provided by your IPTV service provider:
- Server URL: The URL of your provider’s server (e.g., http://example.com:8080)
- Username: Your assigned username
- Password: Your assigned password
- Click “OK” or “Add” to save the details
- The app will connect to the server and load all available channels and content
Note: Make sure to enter the server URL exactly as provided by your IPTV service, including any port numbers (e.g., “:8080”).
Method 2: Using M3U Playlist URL or File
If your provider has given you an M3U playlist instead of Xtream Codes:
- Launch IPTV Smarters on your Windows PC
- Click on the “Add User” button
- Select “M3U Playlist URL” or “Load Playlist or File/URL”
- Enter the following details:
- Playlist URL: The URL of your M3U playlist (e.g., http://example.com/playlist.m3u)
- Or click “Browse” to select a local M3U file if you have downloaded one
- EPG URL (optional): If you have a separate EPG (Electronic Program Guide) URL, enter it here
- Username (optional): Enter if provided by your service
- Password (optional): Enter if provided by your service
- Click “OK” or “Add” to save the details
- The app will parse the playlist and load all available channels
Important: If you’re using a local M3U file, make sure it’s in a location that won’t be moved or deleted.
Adding Multiple IPTV Providers
IPTV Smarters allows you to add multiple providers or playlists:
- Follow either Method 1 or Method 2 above to add your first provider
- To add additional providers, click on the menu icon (usually three lines or dots)
- Select “Settings” or “Manage Users”
- Click “Add User” or “+” to add another provider
- Follow the same steps as before to add the new provider details
- You can switch between providers using the menu or user selection option
Configuring EPG (Electronic Program Guide)
The EPG provides program schedules and information for your channels:
- If your provider includes EPG data with their service, it should load automatically
- To manually add or update EPG:
- Go to Settings > EPG Settings
- Enter your EPG URL if you have a separate one
- Set the EPG timeframe (how many days of program data to load)
- Click “Update EPG” to refresh the program guide data
Tip: Some providers require you to update the EPG manually. It’s good practice to update it regularly for the most current program information.
Customizing IPTV Smarters Settings
General Settings
- Access Settings by clicking on the gear icon or menu > Settings
- Under General Settings, you can customize:
- App Language: Choose your preferred interface language
- Time Format: 12-hour or 24-hour format
- Buffer Size: Adjust streaming buffer (higher values reduce stuttering but increase start delay)
- Default Player: Select your preferred video player (internal or external)
Video Playback Settings
- In Settings, navigate to Player Settings
- Customize your video playback experience:
- Hardware Acceleration: Enable/disable for better performance (recommended: enabled)
- Default Video Resolution: Set preferred quality (Auto/HD/SD)
- Audio Track Language: Set preferred audio language if available
- Subtitle Settings: Configure subtitle appearance and default language
Parental Controls
To restrict access to certain content:
- Go to Settings > Parental Control
- Enable Parental Control
- Set a PIN code
- Configure content restrictions based on ratings or categories
- Apply the settings
Using IPTV Smarters Features
Navigating the Interface
IPTV Smarters has a user-friendly interface with several main sections:
- Live TV: Browse and watch live television channels
- VOD (Video on Demand): Access movies and on-demand content
- Series: Browse and watch TV series episodes
- Catch-up: Watch previously aired programs (if supported by your provider)
- Favorites: Quick access to your favorite channels and content
- EPG: View the program guide with scheduled shows
Watching Live TV
- Select the “Live TV” section from the main menu
- Browse channels by category (Sports, News, Entertainment, etc.)
- Click on a channel to start watching
- Use the on-screen controls to:
- Adjust volume
- Toggle fullscreen mode
- Pause/resume playback
- Change audio track or subtitle settings
Tip: Right-click on a channel to add it to favorites or access additional options.
Using the EPG (Program Guide)
- Access the EPG by clicking on the “EPG” or “Guide” button
- The guide displays current and upcoming programs for each channel
- Click on a program to see detailed information
- Click on a current program to watch it immediately
- Some versions allow you to set reminders for upcoming programs
Watching VOD Content
- Select the “VOD” or “Movies” section
- Browse content by category, genre, or using the search function
- Click on a movie or show to view details
- Click “Play” to start watching
- Use on-screen controls for playback options
Managing Favorites
To create a personalized list of favorite channels:
- While watching a channel, click the star or heart icon
- Alternatively, right-click on a channel and select “Add to Favorites”
- Access your favorites by clicking on the “Favorites” section
- To remove from favorites, click the star/heart icon again or use the right-click menu
Search Function
To quickly find specific content:
- Click on the search icon (magnifying glass)
- Enter the name of the channel, movie, or show you’re looking for
- Results will appear as you type
- Click on a result to access the content
Advanced Features
Multi-screen Support
IPTV Smarters supports viewing multiple channels simultaneously:
- Go to the Live TV section
- Look for the multi-screen or split-screen option
- Select how many screens you want (2, 3, or 4)
- Click on each screen to select the channel to display
External Player Integration
You can use external video players with IPTV Smarters:
- Go to Settings > Player Settings
- Select “External Player” as your default player
- Choose your preferred external player (VLC, MX Player, etc.)
- When you select a channel or content, it will open in your chosen player
Recording (If Supported)
Some versions of IPTV Smarters support recording:
- While watching a channel, look for the record button
- Click to start recording
- Access recordings through the Recordings or Library section
- Note that recording requires adequate storage space on your device
Troubleshooting Common Issues
Buffering or Stuttering Playback
If you experience buffering or stuttering:
- Check your internet connection:
- Run a speed test to ensure you have adequate bandwidth
- For HD content, at least 10 Mbps is recommended
- For 4K content, at least 25 Mbps is recommended
- Adjust buffer settings:
- Go to Settings > Player Settings
- Increase the buffer size (try 5-10 seconds)
- Enable hardware acceleration if available
- Reduce video quality:
- If available, select a lower resolution stream
- Some channels offer multiple quality options
- Close other applications:
- Other applications might be using your bandwidth
- Close unnecessary programs, especially those that stream content
Connection Errors
If you see “Connection Error” or “Stream Unavailable” messages:
- Verify your provider details:
- Double-check the server URL, username, and password
- Ensure there are no typos or extra spaces
- Check if your subscription is active:
- Contact your IPTV provider to confirm your subscription status
- Some services require periodic renewal
- Try an alternative connection method:
- If using Xtream Codes, try the M3U playlist option instead
- If using M3U playlist, try Xtream Codes if available
- Check your internet connection:
- Ensure you’re connected to the internet
- Try resetting your router
App Crashes or Freezes
If the application crashes or freezes:
- Restart the application:
- Close IPTV Smarters completely
- Relaunch the application
- Update the application:
- Check for updates in the Microsoft Store or on the official website
- Install the latest version if available
- Clear cache and data:
- Go to Settings > Storage > Clear Cache
- In some versions, you may need to uninstall and reinstall
- Check system resources:
- Ensure your PC has enough free RAM and storage
- Close other resource-intensive applications
EPG Not Loading
If the Electronic Program Guide isn’t loading:
- Update EPG manually:
- Go to Settings > EPG Settings
- Click “Update EPG” or “Refresh EPG”
- Check EPG URL:
- Verify that the EPG URL is correct
- Some providers require a separate EPG URL
- Check your internet connection:
- EPG data requires internet access to update
- Ensure you have a stable connection
- Contact your provider:
- Some IPTV services have limited or no EPG support
- Confirm with your provider if EPG is included
Audio or Subtitle Issues
If you experience problems with audio or subtitles:
- Change audio track:
- While playing content, access the audio settings
- Select a different audio track if available
- Adjust subtitle settings:
- Enable or disable subtitles as needed
- Change subtitle language if multiple options are available
- Check player settings:
- Go to Settings > Player Settings
- Adjust audio and subtitle default settings
Keeping IPTV Smarters Updated
To ensure the best performance and access to the latest features:
- Microsoft Store version:
- Updates are handled automatically through the Microsoft Store
- Ensure automatic updates are enabled in your Microsoft Store settings
- Official website version:
- Check the official website periodically for new versions
- Download and install updates manually when available
- BlueStacks version:
- Update through the Google Play Store within BlueStacks
- Keep BlueStacks itself updated for optimal performance
Conclusion
IPTV Smarters is a powerful and versatile application for streaming IPTV content on your Windows 10/11 PC. With its user-friendly interface, extensive feature set, and multiple installation options, it provides a comprehensive solution for accessing live TV, movies, and series.
By following this guide, you should now have a fully functional IPTV Smarters setup on your Windows computer. Whether you’re a casual viewer or a power user, the application offers the flexibility and performance needed to enjoy your IPTV subscription to the fullest.
Remember to keep your application updated and maintain a stable internet connection for the best streaming experience. If you encounter any issues not covered in this guide, consider visiting the official IPTV Smarters website or contacting your IPTV service provider for additional support.
Happy streaming!


